
I recently finished the PEN-300 Course by Offensive Security and successfully completed the exam to earn my OSEP certification. I haven’t seen a lot of reviews on the course yet, so I thought I’d offer my own thoughts on it.
What I’ll Cover
- What The Course Is
- How OSEP compares to OSCP
- Similarities and differences
- The Course Review
- Who I am, and who this is aimed for
- My study plan and time involved
- PDF videos, exercises and extra miles
- Final Materials “Walkthrough” of how to use the Challenge labs
- Challenge Lab Exercises
- Challenge Lab methodology
- End to End Kill Chain
- Tooling and C2
- Notes and Reporting
- Exam
- How to prepare for the exam
- Reporting
- Overall
- My favorite parts
What is the OSEP Course?
If I had to summarize the OSEP course, I would start by comparing it to the OSCP. The OSCP is all about learning how to attack vulnerable machines. If OSCP is how to attack vulnerable machines, then OSEP is how you attack non-vulnerable machines. OSEP focuses on attacking up-to-date systems running proper security tooling like AV, AppLocker, and Powershell CLM.
It focuses on gaining initial access to a machine, overcoming AV to get execution on the machine, and utilizing common misconfigurations as an attack path instead of relying on old vulnerable versions and exploit code.
Although the OSEP is still considered a Penetration Testing certification, it has definitely been beneficial to Red Teaming activities, if you care to split those hairs.
The OSEP is a natural extension to the OSCP. There are times where it feels like you’re picking up right where you left off in OSCP. The expectation coming into the OSEP is that you’ll be able to compromise basic vulnerable code. For example, a web server in a DMZ might have a SQL injection flaw, can you leverage it to gain shell access to the machine? You’ll be expected to do that without hand-holding, since that’s not the focus of this course.
If you’ve done other Offensive Security certs, then you’ll know what to expect with this one. Standard expectation has become: materials, videos, and a training lab. Unlike the OSCP however, there is no need to report on the lab environment (other than good practice).
The Course Review
Who I am and Who I’m Not
I feel compelled to clarify that I’m not the security guy that knocks out a cert like this in a week. I’m not the guy who reads the PDF in week one, then ignores the course for 2 months, and then passes the 48 hour exam in 5 hours.
I’m the guy that signs up for all 90 days because I know I’ll need all 90 days to learn the material. I’m the guy that puts in 3 hours of studying on weeknights, and 6 – 8 hours of studying on weekends, for all 90 days.

I’m the guy that reads the PDF section by section, and consumes the first 6 weeks of my 12 weeks total just going over the material. On the low end, I did 24 hours a week studying, and on the high end, about 32 hours a week studying.
I mention this, because this isn’t an industry reserved to techy savants that have a knack for it. I’m an average person with interests and hobbies outside of InfoSec, so I’ll never be the guy that can knock out Offsec Certs without a heavy lift.
The Course Layout
To start the course, you’ll get the PDF, videos, and a VPN connection to the labs. I had already done the OSWP and OSCP, so this was pretty standard.
My recommendation is to start by going through the PDF and / or videos, and once you’ve completed those, start reviewing the Challenge Labs.
The PDF and videos were actually remarkably similar for this course. In the past, I’ve felt like you can pick up on some things in the video that weren’t really in the PDF, and vice-versa. For the OSEP, they’re really close to a perfect mirror. I probably could have saved some time if I had known this in advance, but even once I picked up on it, I still did both.
I read through each section in the PDF, and then followed it up by watching the videos. Despite them being the same, I still found it helpful to hear the review, and then I could follow along with any code or tools that the section focuses on.
Most sections end with exercises to test your knowledge. In addition to those exercises, there are some sections with “Extra Miles” exercises. The Extra Miles aren’t testable knowledge, but are great areas where you can expand on the knowledge they’ve taught.
The Extra Miles aren’t necessary for you to succeed in the exam. In fact, I didn’t do any of them. I actually really wanted to, but I had been plotting out my progress on my calendar and I knew I wouldn’t have enough time to finish everything in 90 days. I found myself going back to the Extra Miles now, after getting certified, since they’re genuinely helpful for Red Team engagements.
Although the Extra Miles can technically be skipped, DO NOT skip any of the standard exercises. Even if they seem ridiculous or obvious, do not skip them. In every case where I thought it might be worth skipping, I ended up learning some quirk, or specific use-case, that I wouldn’t have found otherwise.
The course materials are wrapped up with a sort of walkthrough. “Combining the Pieces” puts together everything and shows how you would use the techniques in an engagement. This is a perfect way to end the course, because after this you move into the Challenge Labs where you are on your own to do the same thing.
Putting it all together
Between the walkthrough of “Combining the Pieces” and the various Challenge Labs, you’ll be executing each stage of the MITRE kill chain. From initial access and execution, discovery, credential access, lateral movement, privilege escalation… and a lot of it will be using custom tooling that you’ll develop throughout the course.
To start, you might find a vulnerable asset on the “public” network, and access to it would give you access to the internal network. You’ll have to craft an exploit that successfully evades AV and gain access to the asset. Alternatively, you might find you can trick users into clicking your links, or downloading / executing your malicious files. Again, you’ll have to craft your client side execution in a way that bypasses AV. Some examples include hta files, js or vbs files, and various maldocs / macro enabled Excel and Word documents. You’ll also be up against protections for standard user logins, like applocker, and constrained language mode.
With access to the first machines, you’ll notice you can now discover machines within the Challenge Lab’s internal network. You’ll work through abusing Active Directory permissions and identifying lateral movement.
In order to access additional items on the internal network, you may occasionally need to proxy through your internal access sessions or beacons. In addition, you create custom tools to move laterally, and abuse SQL Server misconfigurations to access servers beyond basic xp_cmdshell executions.

Active Directory abuse is a fair part of these labs. From various child domains within the root forest, to inter-forest movement, you’ll be enumerating access and misconfigurations quite a lot. True to Offensive Security ways, you’ll enumerate this rather manually throughout the course. Individual PowerView commands will help you identify ACLs that you can abuse. While this is perfectly workable, it would be worth your time to be comfortable with bloodhound to review this data.
Tooling
One of the great things about this course is that it’s taught using meterpreter sessions in Metasploit. I think this is great, because comparable courses seem to push custom C2 frameworks or use tooling that not everybody is familiar with. Using Metasploit makes the entire course super accessible, and quite honestly, if you can successfully implement the HIGHLY fingerprinted meterpreter reverse shells, you’ll be able to adapt to any other C2 framework of your choice.
The course does show some meterpreter specific sections, but they’re all things that can be executed via other tooling. For example, mimikatz is integrated with meterpreter, or token manipulation with incognito. In both cases, you could find other ways to dump creds to steal tokens.

You’ll also notice the PDF mentions other C2 frameworks as well, even asking you to try some techniques through these alternative C2 frameworks within some of the exercises. While most people I’ve heard from used meterpreter exclusively, I opted to use a C2 framework. The PDF makes mention of Covenant or Powershell Empire, but I personally used PoshC2. My recommendation would be to use whatever framework you’re most comfortable with. The Exam limitation is that the framework needs to be freely available. Commercial tools or paid-for tools are not to be used, for example, no Cobalt Strike. I would also recommend that IF you’re going to use an alternative C2 framework, start using it during the Challenge labs, this way, you can work out your methodology before your exam time.
My Exam Recommendations
To succeed in the exam, you need to be able to complete all of the Challenge Labs. To succeed in the labs, you need to take great notes during the course.
I’d recommend taking notes for all of the Challenge Labs too. Take notes as if you were going to write a report off of those Challenge Labs, or if you’re really dedicated and have the time, actually write practice reports from the Challenge Labs.
Taking notes during the labs is especially critical, because it gives you a copy of the exact syntax for each command you might need to execute. The last thing you want to do on the exam is waste time working through syntax errors. Take the labs as an opportunity to work through this type of thing AND CAPTURE IT in your notes.
Just like a PenTest report, if you take good notes up front, then you’ll have everything you need when you’re writing the report. If you take good notes during the course, you’ll have everything you need during the exam.
Even still, having everything I needed, I took most of the 48 hours to complete the exam. Unlike my experience with the OSCP, where I stayed up all night and worked nearly non-stop, my OSEP was much more properly spaced out. I worked normal 8 hours workdays, with a lunch halfway through. I took a few hours to myself after “work” to relax and have dinner. I went back to the exam for a few hours, before going to bed at night at my usual time, and waking up the next day for another “day at work”.

To pass the exam, you need to obtain at least 100 points, or alternatively you can gain access to a specific target within the exam network. I only stayed up late on my second night of the exam because I wanted to gain access to the specific target even though I already had enough points to pass. My only point of contention with the exam, is a small lack of clarity on what qualifies for screenshots. As a result, I opted to inject meterpreter shellcode out of my C2 framework to grab screenshots from a meterpreter session Shell.
Now that I’ve passed the exam, it will be on to the next Offensive Security certification.
Other Cool Notes and Technical Details
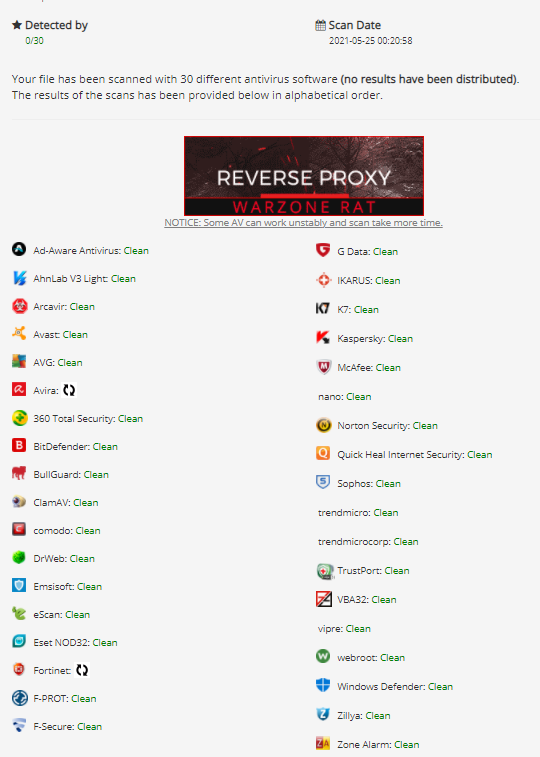
Based on what I’ve learned in the course, I’ve successfully implemented custom tooling within my engagements and written new payloads for execution. The payloads are all Fully Undetected by standard defensive tooling.
The techniques have successfully transferred to custom tooling in other frameworks, like Cobalt Strike customizations and BOFs.
I’d like to share some of the knowledge that the course builds, without sharing details directly from the coursework. Prior to the course, I had minor basic exposure to C#. This has changed very quickly, and as a direct result of this course, I’ve shifted to building most of my tooling in C# now,. I currently prefer C2 frameworks that provide an easy way for me to integrate these tools. At worst, you can use your powershell windows to reflectively load the .NET assemblies.
More than that, OSEP teaches C# and interacting with Native Win32 APIs. Having now spent some time doing this, I’ve started more C++ efforts, which I had never done until after this course. In addition to a handful of tools in those languages, I’m fully comfortable with various shellcode runner APIs. This comfort level makes OSED a logical next step, as the shellcode that I inject is still generated by frameworks at the moment.
Obviously a large part of the interest in this course is the AV evasion. A step by step through various AMSI bypasses within powershell was great, and I feel like the debugging process is a good primer for OSED. Other AV evasion techniques like signature based bypasses are discussed, and deeper evasion techniques like understanding sandbox analysis or behavioral bypasses were brought up afterwards. Each example has become an optional technique in my toolkit when I need to prevent detection in my programs.
I also really liked the sections on AD and credential abuse. You’ll get familiar with Access Tokens and Kerberos tickets and how to utilize them. This means you don’t need passwords or password hashes to start moving laterally throughout the domain, which was an important step up from the OSCP material. They also cover commonly abusable services, like Unconstrained, Constrained, and Resource-Based Constrained Delegation of Kerberos tickets.
By the end of the course, I was significantly more comfortable with C#, js, vba macros, hta’s, and even powershell which is something I was already very comfortable with. I also found value in the SQL Services techniques that I haven’t seen elsewhere, the best practices for C2 setup for network IDS / IPS, and found a lot of value in the Challenge labs, which really gave me an opportunity to test out the tools and techniques within a well replicated “internal network” environment. At one point, I even had 60-70 beacons going out to my C2 server with various access, so I could test tools we had written and lateral movement techniques.
Overall, I thought OSEP was a great course, and laid out in a super achievable and logical way. If you have any penetration testing experience, OSEP is a great certification to up your skills.
Best post on this certification I have read to date. Kudos! I just started this journey as well. Congrats on passing too.
Great article! I am studying for OSEP as well and would like to try PoshC2. However, I am having a hard time adapting my droppers to poshC2. Any hints/suggestions would be welcome 🙂
Depends on your dropper I suppose, but they have a base64 encoded byte array that I like to use in my shellcode runners since it’s easy. Otherwise the raw bin files are the way to go for custom shellcode runners. Posh has a pretty large selection of default droppers, so there’s likely to be one that is similar to what you’re going for. See if you can find one that matches your dropper and modify it for AV evasion.
Thanks for your reply!
I managed to make get my custom dropper working. I would like to discuss a bit further with you on the capabilites of PoshC2 with regards to the labs if you do not mind 🙂